
If you are having trouble with your rear brakes on a 2012 Chevy Silverado, there are some basic steps that you can take to get them working properly again.
First, make sure the parking brake is off and the transmission is in Park.
Next, use the emergency key to unlock and open the driver’s side door. Finally, use a wrench to unscrew both left and right rear calipers from the rotors.
Once they’re free, reinstall them using new pads if needed and reattach the caliper brackets.
Contents
- 1 Rear Brakes on a 2012 Chevy Silverado
- 2 How to Change Rear Brakes on a 2012 Chevy Silverado
- 2.1 Locate the Rear Brake Calipers
- 2.2 Remove the Rear Brake Bolts
- 2.3 Disconnect and Remove Rotors
- 2.4 Clean and Inspect Rotors
- 2.5 Locate the Rear Brake Reservoir
- 2.6 Disconnect hose from reservoir
- 2.7 Remove Reservoir Cap and Hose
- 2.8 Check Valve Valves at Reservoir Baseplate & Wheel Rim Hubs
- 2.9 Open Release Valve at Reservoir Baseplate & Wheel Rim Hubs
- 3 Signs of Bad Rear Brakes on a 2012 Chevy Silverado
- 4 Maintenance Tips on Rear Brakes of 2012 Chevy Silverado
- 5 FAQs
- 6 To Recap
Rear Brakes on a 2012 Chevy Silverado
The rear brakes on a 2012 Chevy Silverado work just like the front brakes and need to be treated with care. Rear brake performance can be affected by several factors, including weight, tire pressure, and alignment.
Many drivers mistakenly believe that pulling their vehicle to the side will fix a faulty or worn-out rear brake system.
Always have your Chevrolet dealer check the condition of your rear brakes before making any repairs or adjustments yourself.
You should also keep in mind that when backing up you want as much distance between your vehicle and the curb as possible- this is especially true if you have large tires on your truck.
Be sure to always use caution while driving- even with proper maintenance and braking systems in place- accidents can happen at any time.
How to Change Rear Brakes on a 2012 Chevy Silverado
If you’re looking to change your rear brakes on a 2012 Chevy Silverado, here’s a step-by-step guide on how to do it.
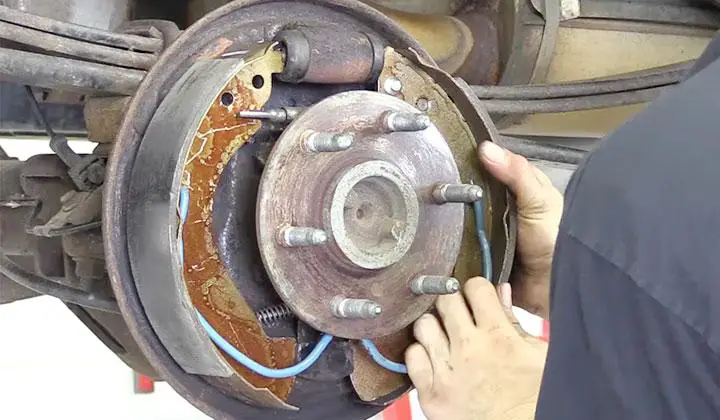
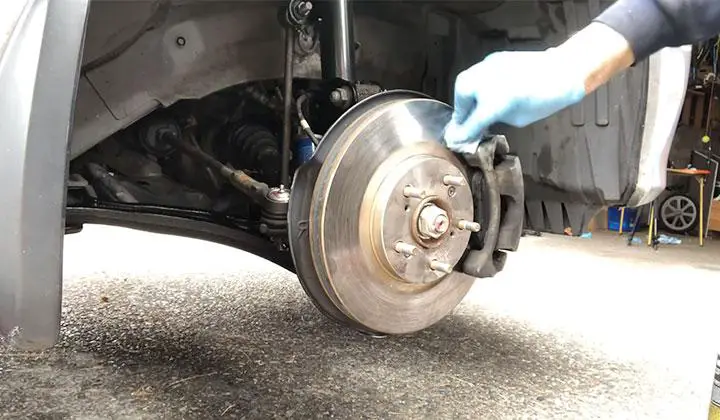
Locate the Rear Brake Calipers
The rear brakes on a 2012 Chevy Silverado are located behind the wheel well on each side.
Use your fingers to feel for two circles of metal that are about 1 inch in diameter and push up from beneath the car to release them.
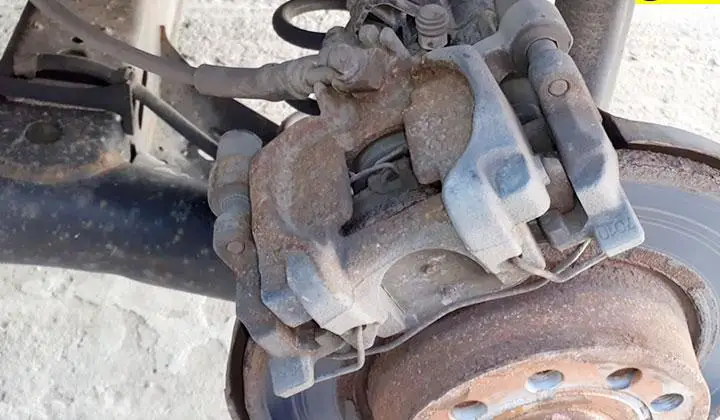
Remove the Rear Brake Bolts
Use a wrench or socket set to remove both bolts that hold each caliper in place, then pull it off of the rotor. Be sure to keep an eye on the rubber hoses as they may fall off during removal.
If you have trouble removing one brake, try switching sides before continuing with the step.
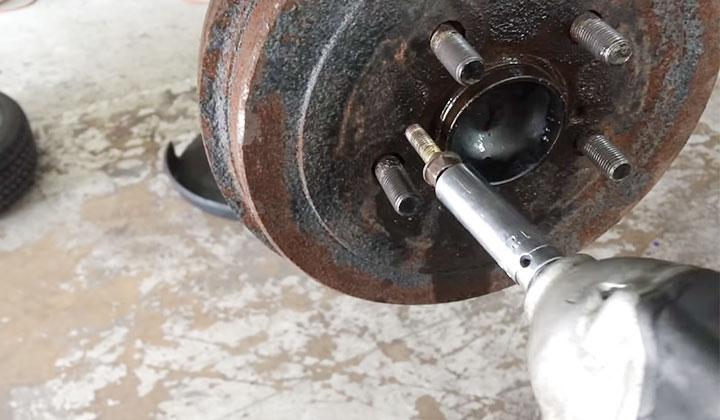
Disconnect and Remove Rotors
Remove both rotors by using a 15MM wrench (Or equivalent). Be sure to protect your eyes from the grass and metal that May be on the rotors.
Once they’re loose, carefully lift them out of their hubs and lay them down flat so they can be stored safely away until later.
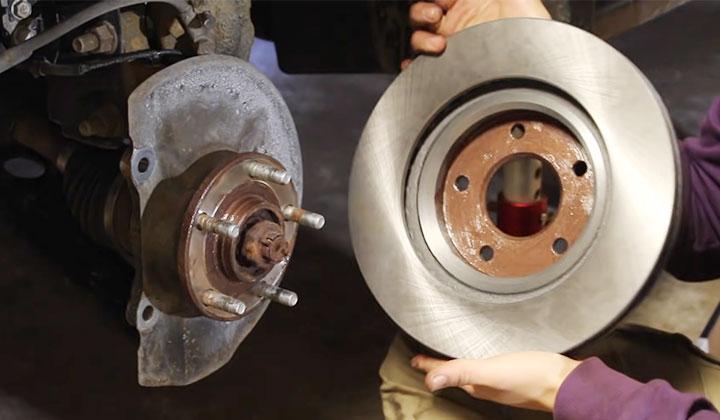
Clean and Inspect Rotors
Once removed, clean all dust and debris from both rotors using brake cleaner or degreaser spray followed by a good quality abrasive pad such as steel wool (do not use scouring pads).
Make sure to apply enough pressure while rubbing so that any dirt is forced into crevices rather than just being pushed around – this will ensure maximum cleaning results.
Finally, inspect both rotors for damage including cracks or dents – if there is any noticeable problem, replace either rotor immediately.
If you need to change the rear brakes on your 2012 Chevy Silverado, follow these easy steps.
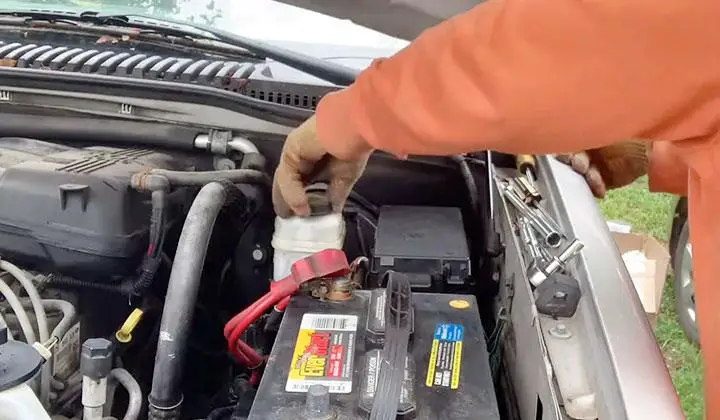
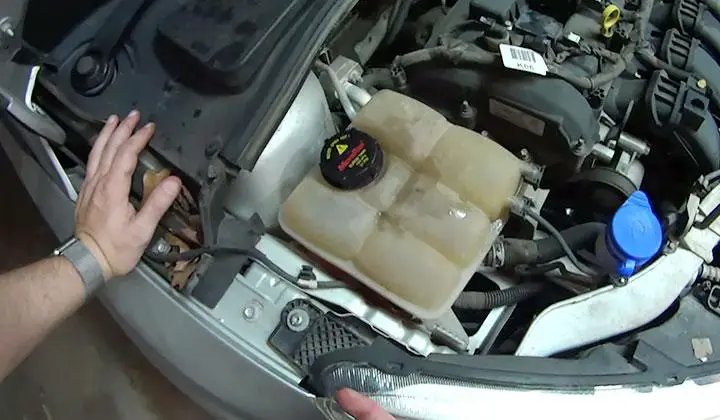
Locate the Rear Brake Reservoir
The reservoir is located on the driver’s side of the rear axle and holds brake fluid. The release valve must be opened before working on or removing any component related to brakes, including the reservoir.
Disconnect hose from reservoir
To disconnect the hose, first locate a plastic clip that secures it in place near one end of the hose. Use a flathead screwdriver to pry up on this clip until it pops off then use your hands to pull away from both ends of the hose until it comes free.
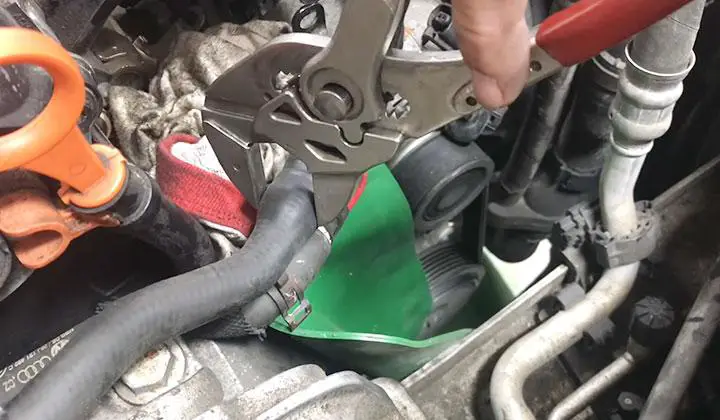
Remove Reservoir Cap and Hose
Now you can remove both cap and hose by using a wrench to turn them counterclockwise (as viewed from behind). Once they are loose, set them aside for later disposal:
Check Valve Valves at Reservoir Baseplate & Wheel Rim Hubs
If there is debris or corrosion inside either valve, you will need to service these components as well as replace them with new valves (if necessary). To do so, first remove all surrounding screws securing each valve cover plate:
Open Release Valve at Reservoir Baseplate & Wheel Rim Hubs
With everything removed except for brake pads and shoes – which we’ll address next – simply open up each release valve by turning it clockwise about 1/4 turn.
Signs of Bad Rear Brakes on a 2012 Chevy Silverado
If you’re noticing any of the following signs in your 2012 Chevy Silverado, it may be time to have the brakes checked: grinding or screeching noises when braking, poor response during hard stops,
or a lack of power when making turns. All three of these problems could mean that your rear brakes are in need of replacement.
Slowed or Stopped Motor
If your rear brakes are not working properly, you may notice a slowed or stopped motor in your vehicle.
This can be caused by the brake pads not gripping the rotors, which will cause the car to slow down or stop.
Erratic Braking Performance
When your brakes don’t work as they should, you may experience erratic braking performance – from sudden stops and jerks to gradual loss of stopping power.
Poor Handling and Stability
A faulty rear brake system can also lead to poor handling and stability in your vehicle – making it difficult for you to maintain control on roadways.
Instability When Driving Downhill
Badly worn or damaged brake hardware can also cause problems with your car’s braking systems – including decreased stopping power and instability when driving downhill.
Maintenance Tips on Rear Brakes of 2012 Chevy Silverado
One of the most important things to keep in mind when it comes to your car’s brakes is regular maintenance. This includes checking and replacing any parts that may need it, such as the brake pads or discs.
Check Your Brake Fluid Level
Make sure you check your brake fluid level every time you do a brake system flush or service to avoid any potential problems down the road.
If your brakes start making unusual noises or feel stiff, it’s probably time for new fluid.
Change Your Rear Brakes if They’re Dried Out
If your rear brakes are starting to make strange noises or feel spongy, it’s usually a sign that they need to be replaced.
Replace them as soon as possible in order to avoid further damage and ensure optimal braking performance.
Adjust Your Brake Pedal Feel
You may want to adjust the pedal feel on some 2012 Chevy Silverado models in order for them to stop more quickly and smoothly than before.
This adjustment can be done by loosening the bolts that hold the pedal arm in place and then moving it up or down until you get the desired response from the brakes.
FAQs
How Much Does It Cost to Replace Brakes and Rotors on a Chevy Silverado?
Generally, the cost to replace brakes and rotors on a Chevy Silverado is between $300 and $750. But resurface cost is low, so you might consider that.
How Long Do Brakes Last on Chevy Silverado?
The expected brake life of a Chevy Silverado is between 30,000 to 70,000 miles.
How Long Do Silverado Rotors Last?
Silverado rotors last between 30,000 to 80,000 miles.
Is It Hard to Change Brake Pads and Rotors?
No, it’s not a hard or long DIY job at all.
Can brake pads come loosen?
Some new brake pad might come loose, so you should check the brake pad before installing.
To Recap
To change the rear brakes, you will need to remove both front and rear wheel assemblies from your Chevy Silverado. Remember to disconnect all hoses and wires before starting work – they could get damaged in the process.
The brake pads should also be replaced at this time – just follow your vehicle’s manufacturer’s instructions.
After changing the brake pads and fluid, reattach everything in reverse order and test drive to make sure everything works correctly.