
Polishing your brake rotors every few months will keep them in good condition and reduce the chance of a brake failure. You can use any type of polish, but be sure to test it on a small area first to make sure that it won’t damage the rotor.
Apply the polish using a clean cloth or applicator pad and work in circular motions until you have achieved the desired finish. Be careful not to over-polish your rotors, as this could lead to damage or discoloration.
Dry off your rotors completely before putting on new pads or discs, and be sure to store them properly so they don’t rust
How To Polish Brake Rotors -Step by Step Guide
If your brake pads are starting to wear down, you may need to replace them. This guide will show you how to properly remove and polish the brake rotors on a car.
Prep the Rotor
In order to polish your brake rotor, you will first need to prepare it by removing any dust and debris.
You can do this by using a vacuum cleaner or a duster. Make sure that all of the cracks and crevices are cleaned before beginning the polishing process.
Apply Polish
Once the rotors are clean, you will need to apply a suitable polish to them. The type of polish that you use will depend on the condition of your rotor and how severe your scratches are.
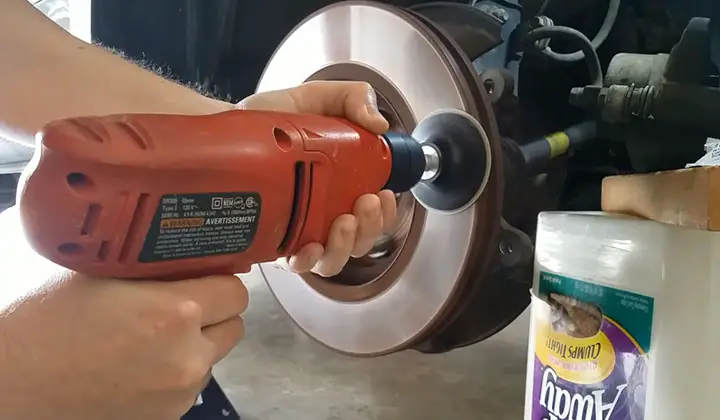
Some common types of polishes include metal polish, diamond powder, and abrasive compounds such as Novus 812 or Mothers Polisher Compound #3105A.
Buffing & Finishing Procedures
After applying polish and working it into the surface with a cloth, buff it until it is shining brightly under light sources (a Leeson wheel works well for this).
Then finish off by hand-buffing in small circles until it’s completely smooth – there should be no visible blemishes left on your rotor.
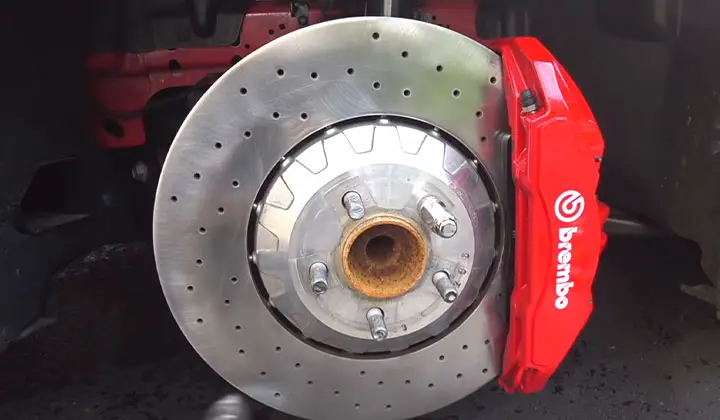
Locate the Brake Rotor
The first step is locating the brake rotor. This can be done by looking for a black or silver band around the wheel, near where it meets the tire.

You may also need to remove some of the wheel hub coverings in order to see it more clearly.
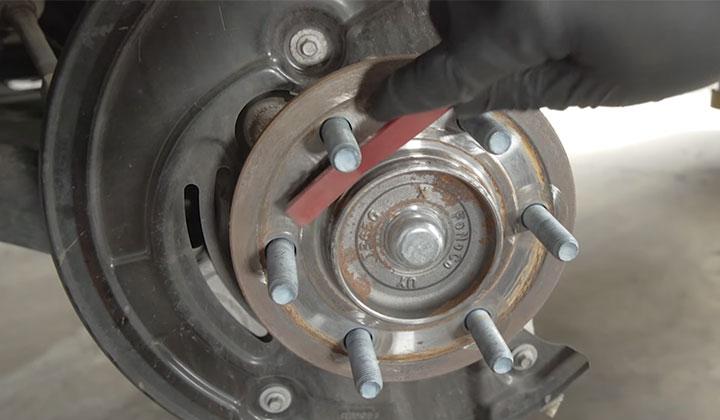
Remove Brake Rotor and Pad
Once you have located and identified your brake rotor, it’s time to start removing it from your vehicle using basic tools such as a screwdriver and wrench.
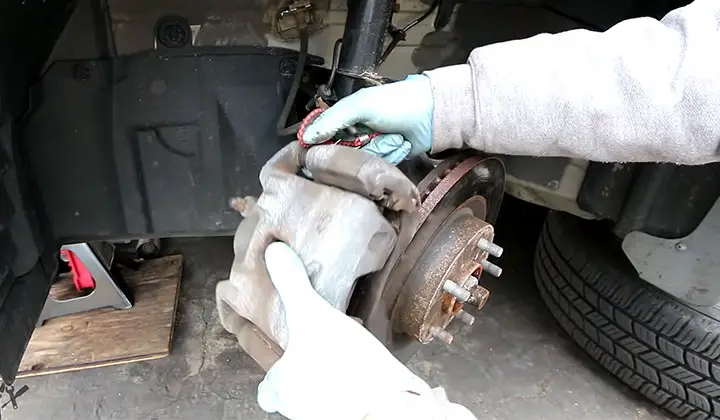
Make sure that you wear safety gear including gloves and eye protection when doing since rotors are very sharp edges.
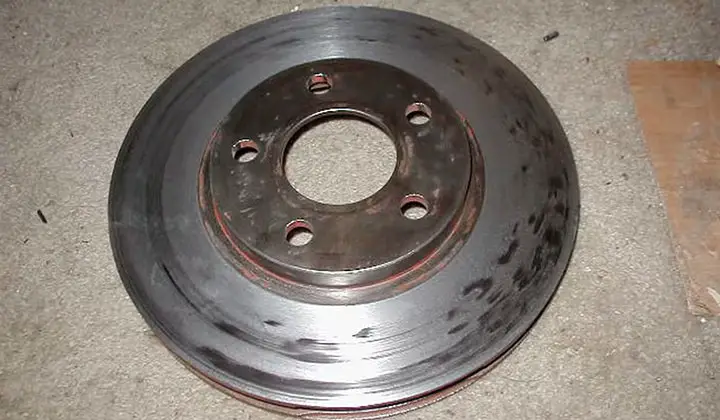
Inspect Brake Rotor Surface for Damage
Once your brake rotor has been removed, take a look at its surface for any signs of damage or wear-and-tear caused by regular use on the road.
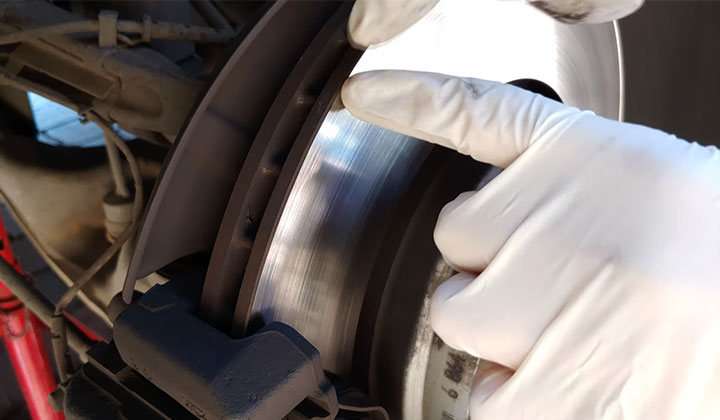
If there are any issues with rusting, pitting, or other indications of serious deterioration, now would be a good time to replace your rotor before anything worse happens.
Clean Brake Rotor Surface After Removal
Now that your brake rotor is out of the way, make sure to clean up all remaining debris from its surface using soap and water – just enough so that you don’t end up damaging new paintwork during installation later on.
Cleaning your brake rotors can be a tedious task, but it is important to keep them in good condition for safety reasons. There are several ways to clean brake rotors and achieve the best results.
Before cleaning, make sure that you have all of the necessary supplies on hand including a bucket, rags, and soap. The process of cleaning brake rotors begins by removing the dust and dirt using a rag or cloth towel.
Next use a soapy water solution to remove any residual grease and debris from the rotor surface. Finally, dry off the rotor with a clean cloth before applying an appropriate polish or sealant.
Install Polished Brake Rotor onto Wheel Hub Coverings & Torque Nut Properly
The next steps involve installing your brand-new brake rotor onto wheel hub coverings properly (using torque specs provided) then tightening down both torque nut (included) AND lug nut securely against the skid plate using socket/wrench).
Do not over-tighten here since this could strip threads off hardware.
Reinstall Wheel Hub Coverings & Tire Pressure Monitoring System Finisher Rings Once Installation Is Completed.
FAQs
Should Brake Rotors Be Shiny?
Yes, brake rotors should be as shiny as possible for aesthetics.
Can You Spray WD40 on Brake Rotors?
In the case of a car, WD40 is used to clean the brake pads and rotor. However, it is not recommended to spray it on your brakes as it can reduce friction and thus increase wear on your brakes.
Can You Spray Brake Cleaner on Rotors?
Rotor cleaning is a major driving force of vehicle design, so spraying brake cleaner on the rotor is essential in order to keep the vehicle’s brakes clean and shiny.
Why Do My Rotors Look, Rusty?
It can be caused by many different factors and can take time to repair. The most common cause of rusting rotors is the metal used for the rotor housing.
Can You Paint Your Rotors?
Yes, you can paint your rotors but the paint should be a high-temperature paint. The reason you need to paint is, black rotors fade overtime.
Can Rotors Last 100 000 Miles?
Yes, the rotors can last 100 000 miles.
To Recap
When it comes to brake pads, it’s important to keep them clean and free of rust so that they work properly. There are a few easy ways to polish your brakes without having to take them apart or deal with harsh chemicals.
Try using a cream cleaner on a microfiber cloth instead of harsh chemicals or abrasives- this will help remove any built-up dirt and dust while preserving the finish on your pads.
If you find that the brake pads still require more attention, then you can try a metal polish like stainless steel wool. but be careful not to damage the finish.
Finally, if all else fails and your brakes still need some TLC, bring them in for professional service- trust us, they’ll appreciate it.