Brake pads can wear down over time, causing your bike to stop or skid more easily on the pavement. Replacing brake pads is an easy DIY project that you can do yourself- even if you’re not a mechanic.
There are different types of brake pads and each requires a specific type of replacement material.
Make sure to get the right size pad for your bike; too large or small will cause it to malfunction and/or make noise when braking.
Follow the instructions below when installing new brake pads- failure to do so could result in damage to your bicycle, brakes, and tires.
Contents
Brake Pads on Bike
Brake pads are important for cyclists because they provide stopping power when you need it most. Most brake pads come in sets of two and should be replaced every few months, depending on how often you use your bike brakes.
If the brake pad becomes worn down or shows signs of rust, it should be replaced immediately to ensure safety while riding your bike.
When replacing a brake pad, make sure that the new one fits properly into the wheel hub and is level with other parts of the wheel assembly (usually just behind the disc).
Some bikes have anti-rust coating on their braking surfaces which will protect them over time if cared for properly; however, this protection may wear off over time as well so always keep an eye out.
Many people also choose to add a layer of grease or oil to their brake pads before putting them away at the end of each day so they don’t seize up during long periods without use – but this is optional and not required by law.
How to Replace Brake Pads on Bike -Step by Step Process
If you’re looking to replace your bike’s brake pads, there are a few important steps that you need to take. First, remove the wheel from the frame. Then, use a Phillips head screwdriver to unscrew and remove the caliper brackets.
After that, gently pull off the old pads and discard them. Replace them with new ones by pushing them onto the rotor until they click into place. Reinstall the bracket and screws, then reattach the wheel.
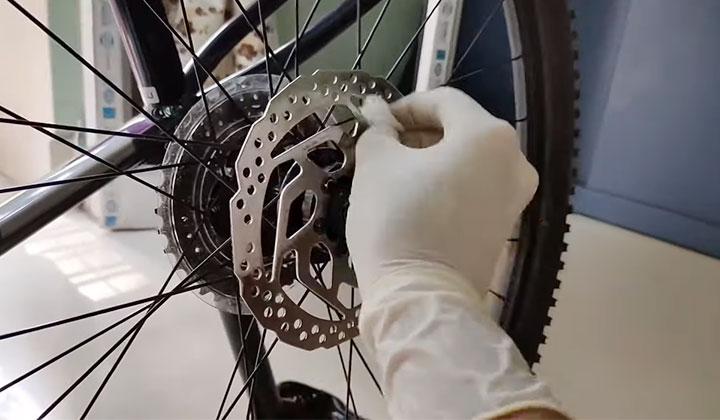
Locate the Brake Pad
The first step is to locate the brake pads. To do this, you will need to remove the wheel and hub assembly.
This can be done by removing screws or bolts that hold it in place. Once it’s loose, you can then carefully pull it off of the rotor.
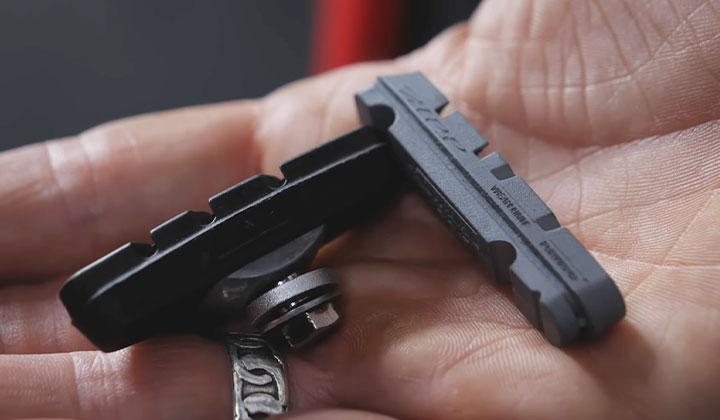
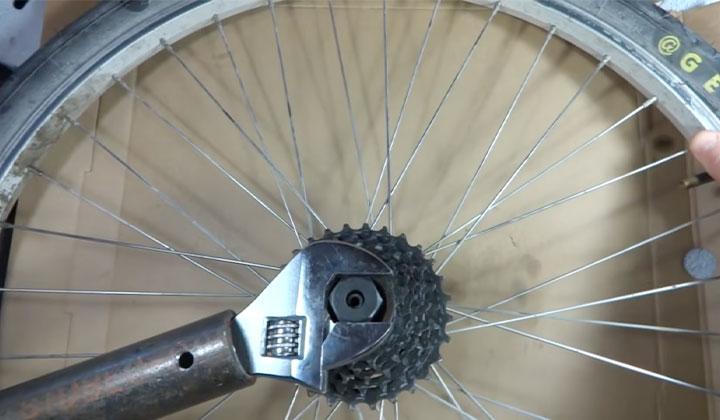
Remove the Old Brake Pads
Once the wheel and hub assembly are removed, you can begin to remove the brake pads by unscrewing them from their caliper brackets using a wrench or a hex key set.
Be sure to replace brake pads at least every two years as they wear down over time and may become ineffective in slowing your bike down properly.
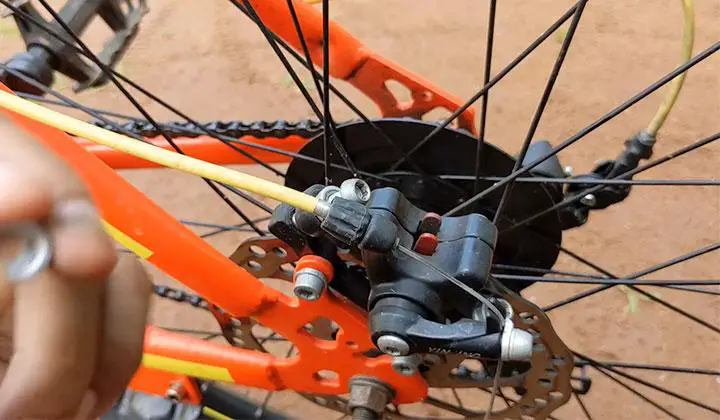
Clean Rotor and Calipers
After removing the brake pads, be sure to clean all of debris from both the rotor and calipers before re-installing them on your bike.
Doing so will ensure proper braking performance for long-term use.
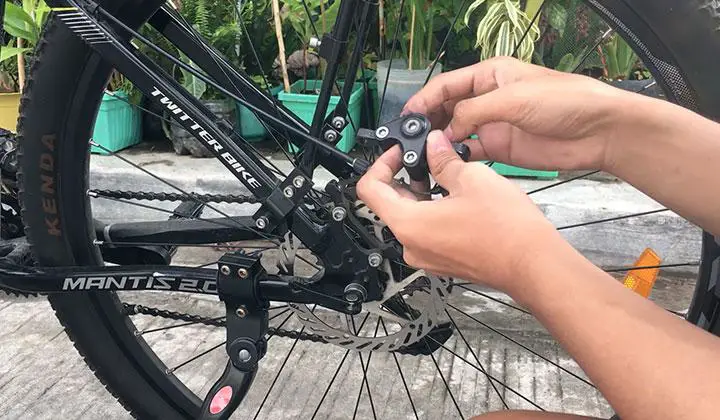
Reinstall Wheel & Hub Assembly
Finally, reinstall everything back together including new brakes installed on top of old ones, making sure there are no gaps between any parts and torque all screws/bolts securely until they’re snugged up.
When to Replace Brake Pads on Bike
If you’re thinking about replacing your bike’s brake pads, it’s a good idea to do so at least once every two years. Brake pads are designed to stop the bike from moving and can wear down over time.
When they start to become worn, they’ll create more noise when you pedal and may even cause your brakes to fail completely.
The following are some of the reasons why you may need to replace your brake pads:
When Brakes Are Failing
If your brakes are not working properly, it is likely that they need to be replaced. This can happen if the rotors or pads have become worn down and don’t stop the bike effectively anymore.
When You Notice Strange Behavior from Your Bike
If you notice any strange behavior from your bike when braking, it is probably time for new brake pads.
This could include trouble stopping in wet conditions, sticking while braking, or a decrease in stopping power overall over time.
Make Noise or Shriek Under Hard braking Conditions
As Pad wear increases due to hard braking practice or general use, noise and screeching will often accompany it as metal against metal friction starts causing minor damage over time (especially at high speeds).
A good indicator that this might be necessary would be if these symptoms start appearing after only a couple thousand miles/kilometers of regular riding – meaning that standard replacements might suffice instead of an entire set being thrown away.
If your bike is older, brake pads may need to be replaced. Brake pads are easy to replace and can be done by yourself using a step-by-step process.
Be sure to loosen the wheel hub nut before removing the brake pad Remove the old brake pad by prying it off with a screwdriver or pliers.
Clean off any residual adhesive from the braking surface with rubbing alcohol or solvent of choice Apply new brake pad onto the braking surface and tighten screws in the opposite direction of those that were removed previously.
Maintenance Tips on Bike Brake Pads
If you’re like most riders, your bike brake pads will get dusty and gritty over time.
To keep them in good shape, follow these maintenance tips:
Check your pads for wear and tear
Brake pads are important parts of your bike, but they can also become worn down over time. This will cause the brakes to stop working as effectively as they should and may even lead to accidents.
To check whether your brake pads need to be replaced, simply squeeze them gently between your fingers. If they feel loose or give way easily, it’s time for a new set of pads.
Cleaning and lubricating your brake pads
Just like any other part of your bike, brake pads require regular cleaning in order to keep them running smoothly.
Make sure you clean them thoroughly with warm soapy water and then apply a quality bicycle pad lubricant afterward.
Be sure not to use oil-based products on these surfaces – these can damage the braking surface over time.
Adjusting Your Brake Pads according to Your Needs
If you find that your bike is stopping too quickly or becoming difficult to pedal when applying pressure at the pedals, it may be necessary to adjust the position of your brake pad(s).
Simply remove one or more screws from the mounting bracket (depending on which type of brakes you have) before moving/aligning the pad(s). Once adjusted properly, replace all screws and tighten firmly using a wrench only if required.
Do not attempt this repair without proper instructions from a qualified mechanic.
Replace Broken Parts Immediately
If one of your brake components breaks beyond repair – such as a screwdriver shaft breaking off inside one of the calipers – do not hesitate in replacing it immediately.
Doing so will prevent further mechanical problems from arising while still giving you enough functionality for basic riding purposes until replacement parts arrive in tailored form (usually within about two weeks).
FAQs
Is It Easy to Replace Bicycle Brake Pads?
Replacing bicycle brake pads is generally a quick and easy process.
However, some pads require special tools or a step-by-step guide, so be sure to check the instructions that come with your pads before starting.
How Often Should You Change Bike Brake Pads?
Bike brake pads should be replaced every 20,000 miles.
Are Bike Brake Pads Universal?
Generally speaking, bike brake pads are universal. This means that they will work with a variety of bikes, including those made by different manufacturers.
To Recap
To replace your bike brake pads, just unscrew and reattach them in reverse order- making sure not to over-tighten. When you’re finished, put everything back together and tighten all of the bolts securely before reinstalling your wheel on your bike.
Always check tire pressure before taking your bike out for a ride since low air pressure can cause decreased braking ability as well as increased wear on components like rotors and calipers.
If you have any questions about replacing brake pads on your bike, feel free to comment below in the comment section writing your problems in detail to get expert advice.