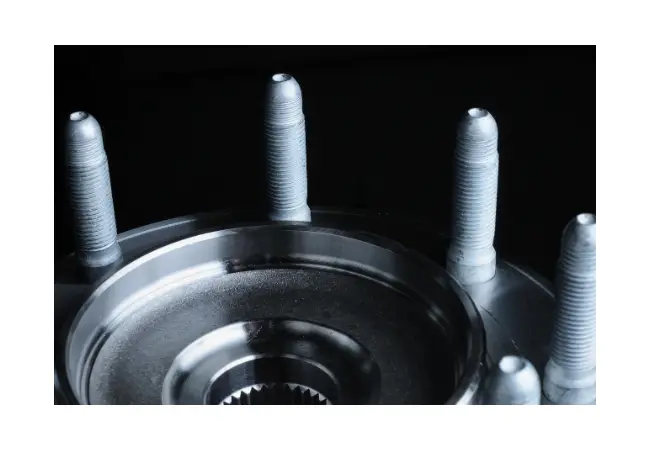
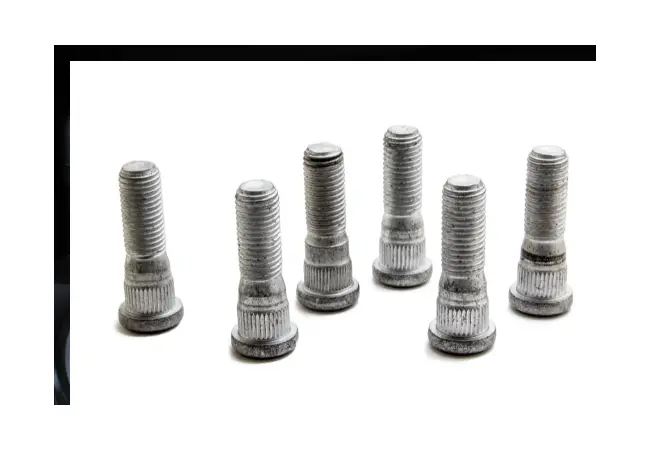
There are several reasons why rear wheel studs might need to be replaced. They can become damaged from an accident, from over-tightening the lug nuts, or due to natural wear and tear over time. In some cases, corrosion can also lead to the deterioration of wheel studs. If a wheel stud is damaged, it can lead to the wheel becoming loose or even falling off, posing a severe risk. Therefore, it’s important to know how to replace wheel studs on drum brakes at the first sign of damage or excessive wear.
Wheel studs play a critical role in the functionality and safety of your vehicle. They are the threaded fasteners on the wheel hub that serves as the mounting points for the wheels. Wheel studs, along with lug nuts, secure the wheels to the vehicle, ensuring they stay in place while the vehicle is in motion. Given their crucial role, maintaining their condition and timely replacement when necessary is of paramount importance for vehicle safety.
Contents
Basics of Drum Brakes and Wheel Studs

Drum brakes operate on a simple principle: when the brake pedal is applied, hydraulic fluid pressurizes the wheel cylinders in the brake system. This, in turn, pushes the brake shoes outward against the inner surface of the brake drum, creating friction, which slows down and eventually stops the vehicle. The drum part of the system is attached to the wheel and the axle, rotating along with them, while the shoes are held in place by springs and adjusters.
Wheel studs, which are an integral part of the drum brake assembly, are permanently mounted on the wheel hub. Each stud serves as the attachment point for the lug nuts that hold the wheel in place. Given their role in securing the wheel to the vehicle, it’s crucial that wheel studs are robust and reliable. Wheel studs need to withstand not only the weight of the vehicle but also the forces applied during acceleration, braking, and cornering. Hence, understanding their function is key to acknowledging the need for their maintenance and timely replacement.
Signs That Wheel Studs Need Replacement
Physical Damage or Wear
Physical damage or wear is one of the most noticeable signs that your wheel studs may need replacement. You might notice this while changing or rotating your tires. Signs of damage can include threads that are worn, stripped, deformed, or a broken wheel stud. If the studs are visually damaged or if the lug nuts don’t secure correctly, this is a clear indication that your wheel studs need replacement.
Difficulty Mounting Wheels
If you’re experiencing difficulty mounting the wheels, it could indicate that your wheel studs need to be replaced. A cross-threaded or stripped stud won’t allow the lug nut to thread on the lug studs correctly, making it hard to mount the wheel securely. This situation is unsafe and calls for immediate replacement of the problematic wheel stud.
Corrosion or Rust
Wheel studs, like any other metal part of your vehicle, can corrode or rust over time, especially if you live in an area with harsh weather conditions or where roads are regularly salted. If you notice significant corrosion or rust on your wheel studs, it’s a good idea to replace them, as the corrosion could weaken the studs over time, compromising their ability to secure the wheels properly.
Tools and Safety Precautions for Replacing Wheel Studs
To replace wheel studs, you’ll need a set of specific tools. These include a lug wrench or impact wrench for removing lug nuts, a hydraulic jack and jack stands for lifting and supporting the vehicle, a hammer and punch for removing the old rear wheel studs, and a new set of wheel studs. Additional items such as a torque wrench for installing the new studs and a brake cleaner for cleaning the area might also be necessary.
Safety should always be a top priority when working on your vehicle. Before starting, ensure the vehicle is on a flat, stable surface. Use a hydraulic jack and jack stands to lift and support the vehicle securely. Never work under a vehicle that is only supported by a jack. Always use the correct tools for the job and ensure you’re using them correctly. If you’re unsure about any part of the process, it’s safer to consult a professional mechanic.
Step-by-Step Guide to Replacing Wheel Studs on Drum Brakes
Begin by securing your vehicle on a flat, level surface. Using a hydraulic jack, lift the side of the vehicle where the damaged wheel stud is located. Ensure the car is stable by placing jack stands under the vehicle’s frame. Never work under a vehicle supported only by a hydraulic jack.
With the vehicle safely supported, use a lug wrench or impact wrench to remove the lug nuts and then take off the tire. If your vehicle has a drum brake, you’ll need to remove the brake drum to access the wheel studs. This might require some force if the drum is rusted onto the hub.
To remove the broken stud, you’ll need to use a hammer and punch. Position the punch on the end of the stud and strike it with the hammer, driving the stud out the back of the hub assembly. Be sure to protect the other components from the force of the hammer blows.
To install the new stud, insert it through the hole in the back of the hub. You may need to use a hammer to start it. Then, place a few washers over the stud on the front side of the hub, thread a lug nut onto the stud, and tighten the nut to draw the lug stud fully into the hub without damaging the stud threads.
Once the new stud is installed, you can reassemble the drum brakes. Replace the brake drum, ensuring it sits correctly. Then, mount the tire back onto the studs and hand-tighten the lug nuts. Lower the vehicle using the hydraulic jack and then fully tighten the lug nuts in a star pattern for even distribution of pressure.
Tips and Common Mistakes When Replacing Wheel Studs
Ensuring Correct Wheel Stud Size
When replacing wheel studs, it’s essential to use the correct size. The new stud should match the old one in terms of thread size, length, and knurl diameter. Using the wrong size can lead to mounting issues or a dangerous failure of the stud.
Properly Aligning the New Studs
During installation, ensure that the new stud is correctly aligned with the hole in the hub. Misalignment can lead to difficulty in installation and potential damage to the stud or hub assembly.
Avoiding Overtightening and Cross-Threading
It’s important not to overtighten or cross-thread the lug nuts when installing the new stud. This can damage the threads on the stud and cause issues when mounting the wheel. A torque wrench should be used to ensure the correct amount of force is applied when tightening each lug nut.
After Replacing Your Wheel Studs

After replacing the wheel studs and reassembling the drum brakes and tires, it’s important to check and adjust the wheel torque. Each lug nut should be tightened to the manufacturer’s recommended torque specification using a torque wrench. This ensures that the wheel will fully seat and helps prevent damage to the new studs.
If you encounter difficulties during the replacement process, or if you’re unsure about any steps, it’s advisable to consult a professional mechanic. This is especially important if, after replacing the wheel studs, you notice unusual noise or vibration, or if the wheel does not seem to be secured properly.
Regular inspection of your vehicle’s wheel studs is a key part of maintaining your vehicle’s safety and performance. During regular tire rotations or brake inspections, take a moment to check the condition of the wheel studs. Look for signs of wear, corrosion, or damage, and replace any studs that appear compromised.
Be sure to check the parking brake cable and adjustment when the brake drum is removed.
If you have disc brakes on your front wheels – you should check the condition of each lug nut, the brake pads, the brake rotor, and each wheel stud.
Conclusion
To replace wheel studs on drum brakes, the process involves lifting and supporting the vehicle, removing the tires and drum, extracting the old wheel studs, installing the new ones, and then reassembling everything. Although it requires some specific tools and mechanical knowledge, it can be accomplished by most car owners with a bit of patience and careful attention.
The condition of wheel studs can significantly impact a vehicle’s safety and performance. Damaged or worn-out studs can lead to the wheel not being secured properly, potentially causing serious accidents. Therefore, maintaining and replacing wheel studs as necessary is a critical aspect of vehicle safety.
Regular maintenance, including checking and replacing a broken stud when necessary, plays a crucial role in ensuring vehicle safety and longevity. By keeping an eye on the condition of all parts of your vehicle, and addressing any issues promptly, you help ensure that your vehicle remains safe, reliable, and enjoyable to drive.
